Pages

Sunday, February 27, 2011

Italian Table Setting


On Saturday night we hosted an Italian dinner party. To set the table I started with a red and white check tablecloth. For the centerpiece I used assorted "Italian" style cans, filled them with sunflowers, red poppies and loafs of bread. I also scattered other cans through out the table with bread sticks in them, had grapes in the wine glasses, red votives, red and clear swirled water glasses and I used green metal wall hangings (from Hobby Lobby) for the placemats. 


To set the stage once the guests arrived I had some Italian music in the background, Chianti ready to be served and the smell of Italian cooking in the air. The final element needed to make it a memorable night - good friends!


Wishing you peace, love and a little pixie dust
-Kendall-

Sunday, February 20, 2011

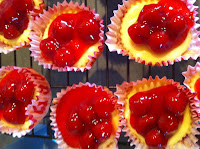
Cooking with Kids : Mini Cherry Cheesecakes

These darling little cheesecakes, delicately flavored with lemon and cherry, are sweet surprises stashed away in the freezer for last minute celebrations or as individual servings at your next party.

Ingredients :

12 vanilla wafers
2 (8 oz) packages cream cheese, softened
2 eggs
2 T lemon juice
2/3 cup sugar
1 (21 oz.) can cherry pie filling

Instructions : 
*Preheat oven to 350* .
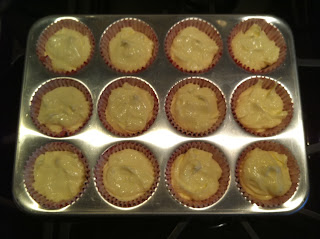
Line 12 serving muffin tin with paper liners. Place a vanilla wafer in each one. In medium bowl beat cream cheese until fluffy. Add eggs, lemon juice and sugar. Beat until smooth and thoroughly combined.


Fill each muffin cup 2/3 full with cream cheese mixture. Bake in preheated oven for 17 minutes, or until tops begin to crack. Take out of pan and cool on a rack. Top with fruit pie filling. Pipe whipped cream on top of each cheesecake just prior to serving, if desired. 
* Can also top with strawberries, raspberries, blackberries, etc.*


Note to head chefs : 
When employing the help of "chefs-in-training" do not expect them to turn out like the picture!!! Whatever they create will be just as beautiful and taste just as good!!!

Wishing you peace, love and a little pixie dust,
-Kendall-

Saturday, February 19, 2011

Stacked Tea Cups Centerpiece


For my daughter's Alice in Wonderland birthday party I decided to make the centerpieces as whimsical as possible. Of course, they had to include giant teacups and saucers, but also other elements from the story. So the hunt was on! The giant polka dot tea cups and saucers I found at Hobby Lobby. I also had some mismatched china tea cups and saucers that I had collected from antique malls, flea markets, etc. These were the base for the designs. I got flowers (for the singing flower garden), feathers, paper butterflies (for the bread and butter butterflies), beads, net flowers, etc. from Hobby Lobby. You know how they say "Diamonds are a girl's best friend" ? It's a lie! Hobby Lobby is a girl's best friend!!!


My favorite place to attack for ideas is the local Dollar Tree. There I found the red glitter hearts, the mini decks of cards, giant rhinestones, more flowers and suckers (which I used in the party favors). Once you have gathered all your supplies, the only thing left to do is to get out your hot glue gun - and get glueing!!! When making centerpieces like these, there is no wrong way to do it. Start with the basic pieces first - the tea cups and saucers - position them to your desired height, and then hot glue them together (at this point don't be stingy with the glue - the more the better to hold it securely!). After you have finished with the base of your centerpieces the fun part begins! Now you get to start embellishing your centerpieces. Stick a flower here, a heart here, feathers here, drape beads here, etc. - there is no wrong way to do this! Remember you are going for whimsical - it doesn't have to have a rhyme or a reason, only grab attention and make you smile! The most important thing to remember when making a centerpiece like this is to have fun! Don't let it overwhelm you - Rome wasn't built in a day and neither do these have to be. It's only hot glue, some flowers, feathers, tea cups, etc. - you can do it!


Wishing you peace, love and a little pixie dust,
-Kendall-

Thursday, February 17, 2011

Alice in Wonderland Party - part 2


You can't have an Alice in Wonderland party without a fabulously whimsical cake - so to help me create this I turned to my cousin, Shari Rosson. She created a cake for us complete with the cheshire cat, the talking roses, cards, the pocket watch, glitter hearts and more!!! The cake looked wonderful and tasted amazing too!!! We were thrilled!


Once the "tea party" part of the party was over, it was time for games! 
1- Queen's Croquet
 The kids used plastic flamingos as the mallets, brown painted styrofoam balls as the hedgehog balls and for the wickets I had painted wooden boards with pictures of characters from the movie. It was so cute and they had a blast! 
2 - Pin the Grin on the Cheshire Cat 
(which is played just like the traditional pin the tail on the donkey game).
3 - Clean Cup, Clean Cup 
(This game is actually played at the tea party table during "tea time". Before the actual tea party began we played the very merry unbirthday song from the Alice in Wonderland soundtrack and every so often we would stop it. Then every one would say "clean cup, clean cup, move down, move down" and move to the seat next to them. The kids would continue to move around the table until they came back to their original seat. As they did this, every time they would move, the Mad Hatter would fill up another tea cup. When the guests arrived back at their chairs they were ready to begin the tea party. Everyone enjoyed this!)
Other ideas include : 
An "I'm Late!" potato sack race, in which everyone has to hop like the White Rabbit to the finish line, or a sugar cube toss game in which the kids try to toss their sugar cubes into a tea set for prizes. The March Hare likes to try and toss sugar cubes into everybody's tea cups, in addition to throwing things!!!


Party Favors
For each party favor I got unfinished ceramic tea cups and saucers and painted and sealed them. Then I filled them all with flamingo suckers, a mini deck of cards, hearts, a marshmallow cupcake sucker, an Alice picture with "Thank You for coming to my very merry unbirthday party. Love Piper" written on it, flower pens, heart sucker bouquets etc... 
Other ideas could include : 
Koolaide bottles with "drink me tags", mushroom or teacup cookies with "Eat Me" written on them, little bubbles with a printed caterpillar sticker on the front and the funny crocodile poem attached, a plastic crab or lobster squirter, chocolate playing cards, white rabbit dolls, a heart wand, etc....


The party turned out to be a blast, our Alice was thrilled  and a good time was had by all! Hopefully if you ever decide to have your own "very merry unbirthday party" you will be inspired by ours!
Wishing you peace, love & a little pixie dust,
-Kendall-

Tuesday, February 15, 2011

Alice in Wonderland Party - part 1

Hear Ye, Hear Ye!
The Queen of Hearts
Invites You to Attend

Piper's 7th Birthday
In Wonderland!

Follow the White Rabbit to :
Country Club Drive
etc.....

For my daughter's 7th birthday she wanted an Alice in Wonderland party so we decided to take our own trip down the rabbit hole and into Wonderland. In our Wonderland we found the Queen of Hearts, the Mad Hatter, the White Rabbit and Alice all ready to party with the kids!!!


When our guests arrived they were greeted by a painted wooden board with the cheshire cat telling them to go "this way, that way, & over there" at the front door walkway. Along the walkway I had placed pink flamingos up either side to lead them to the door. Once they arrived to the front door they had to walk by the mushrooms, roses, clocks and cards. On the front door was another painted board of the White Rabbit basically inviting them to follow him in - down the rabbit hole. Once the guests got inside, the girls were all given tulle tutu's to wear and taken to the back yard out into our Wonderland.


For the "Mad Hatter" tea party part of the party, I had accordian style top hats wrapped with tulle, flowers & the Mad Hatter price tag sitting in the seats of the chairs. At each place setting was a heart doile' that had the guests mismatched teacup and saucer on it, their silverware and their teacup party favor. The silverware I had wrapped in different colored napkins, tied with tulle and flowers. For the centerpieces I had stacked different sizes, colors, etc. of teacups and then added all kinds of Alice in Wonderland themed embellishments (I'll talk about them later).  Above our Mad Hatter tea party table, hanging from the ceiling, were giant glitter hearts, cards, flowers & butterflies. Down the center of the table were clocks, cards, flamingos and hearts. 


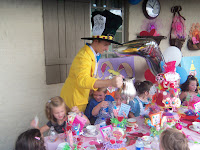
For the actual tea party all the guests were served their tea by the host himself : The Mad Hatter. The Queen of Hearts and The White Rabbit served them their food. For food I had heart shaped sandwiches filled with cream cheese and strawberry jelly, red and pink heart shaped peeps marshmallows, strawberries and heart shaped cookies.  After the guests were finished with their tea party, it was time for cake!!!


Coming in part 2 .......
Party Games, Party Favors, Cake Photos, Centerpieces and more!!!
Wishing you peace, love and a little pixie dust,
-Kendall-

Wednesday, February 9, 2011

Valentine's To Make With Kids

5 Fun, Quick & Easy Valentine's To Make With Your Kids

1. Sweet Shovels
Materials : 
small bag of candy
twist tie
ribbon
toy sand shovel
paint pen

Instructions : 
Tie up your small bag of candy with a twist tie. With your ribbon, tie it to the handle of your toy sand shovel. Use a paint pen to write your message at the base of the shovel, just below the candy bag. 

Message Ideas : 
* I dig you!
* Here's the scoop on Valentine's Day!
* It's Valentine's day --Dig it!
* You've got the scoop on me!

2. Crayon Heart
Materials : 
Crayon pieces
Heart shaped metal cookie or muffin tin with hearts 
Scrap paper
Double sided foam mounting tape
Scissors
Colored card stock
Marker


Instructions :
Heat oven to 250*. Fill each mold with crayon pieces and bake  until the crayons melt, about 10 - 15 min. Place a sheet pan under the crayons to catch any drips. Once the hearts have cooled, remove them from the molds & smooth any rough edges by rubbing them on a scrap paper. Use small pieces of foam tape to stick them to a circle cut from the card stock. Add message.

Message Ideas : 
* You color my world
* Valentine, You Make My Heart Melt
* Have a Happy Valentine's Day for "crayon" out loud!


3. Dynamic Duo
Materials : 
Double sided tape
Individually wrapped candy
Card stock
Marker


Instructions : 
Using double sided tape secure one end of 2 pieces of candy inside a piece of folded card stock. Write your message with marker on the outer flap.


Message Ideas : 
* "We're two of a kind!"
* "You've met your match!"
* You're two cute"


4. Play Clay Hearts
Materials: 
3 cups of white flour
1  1/2 cups of salt
1  1/2 T. cream of tarter
3  1/4 cups of water
6 T vegetable oil
red food coloring
rolling pin
heart shaped cookie cutter
small cellophane bags
scissors
white paper
markers
hole punch 
ribbon


Instructions : 
Mix the flour, salt & cream of tarter in a med. saucepan. In separate bowl, mix the liquids, adding drops of red food coloring until you reach your desired shade. Pour the liquids over the dry ingredients and stir. Cook over med-low heat, stirring constantly, until the mixture holds together and gets too stiff to stir, about 5-10 min. Let it cool. Knead the clay briefly, then roll out to 3/4" thickness & cut with cookie cutter. For each Valentine, place a clay heart in cellophane bag. Cut a tag out of white paper, decorate it with markers & punch a hole in one end. Thread a length of ribbon through the tags hole & tie the bag shut with a bow.


5. Rock Candy
Materials :
Tape
2 (14 inch) pieces of string
2 mini peanut butter cups
1 (1 oz. ) box conversation hearts
2 (4 inch) circles of aluminum foil
4 by 7 inch piece of pink paper
glue stick
Scroll wheel & playlist from ipod printed out on white paper


Instructions : 
Tape each end of a string to a peanut butter cup. Tie the other end of 1 piece of string to the the other string as shown and the remaining loose end of string tape to the candy box. Wrap each peanut butter cup in a circle of aluminum foil. Wrap the pink paper strip around the candy box and secure it with a glue stick. Cut paper shapes and write text for the scroll wheel and playlist ( or download & print one). Use a glue stick and attach them to the box. Write a Valentine message on the back of the box. 


Most of these cute Valentine ideas I found in Family Fun magazine. We tried them all and they can all be made in about an hour. They are fun to make for kids ages 4 - 94, and even more fun to receive!!! Have fun!


Wishing you peace, love and a little pixie dust,
-Kendall- 

Saturday, February 5, 2011

Cupcake of The Month - Hearts a Flutter


These cupcakes were simply scrumptious!!! They were easy to make - since you start with a basic "cake mix in a box" - but were anything but ordinary. Adding spice to the cake mix helps to give them some zing, while the creamy goodness of the homemade icing is the perfect sweet temptation! 

Hearts A Flutter Cupcakes

ingredients :
1 - 18.25oz. choc. devils food cake mix
water, eggs & oil
1 1/2 tsp. ground cinnamon
24 Hershey's Hugs, unwrapped
1 1/2 cups butter, at room temp
6 cups powdered sugar, (32.oz. pkg)
1/2 cup sour cream
2 tsp. vanilla extract
red food coloring
white nonpareil and Wilton Jumbo Hearts Sprinkles
(these can be purchased at Michael's or Hobby Lobby)
pastry bags and med. round tips


Preheat oven to 350*F. Line 24 muffin cups with cupcake liners. Prepare cake mix with water, eggs & oil as directed on pkg. Add cinnamon. Divide batter among liners. Press 1 Hug into center of each. Bake 20-25 min. or until toothpick comes out clean. Cool 10 min. then transfer from pan to rack to cool completely.

Icing : On med. speed, beat butter until creamy. On low speed, gradually beat in sugar until blended. Add sour cream and vanilla. On med-high speed beat until light and fluffy. Transfer 2 cups frosting into a separate bowl & stir in 8 drops food coloring until blended. Put frosting into a pastry bag fitted with a round tip. Reserve. Transfer 2 more cups of frosting into a bowl and add 22 drops of red food coloring. Put this frosting into a pastry bag fitted with a round tip also. Reserve. Transfer remaining white frosting into pastry bag fitted with the round tip. Pipe alternate circles of white, light pink & dark pink frostings over cupcakes. Decorate with sprinkles. Enjoy!!!


 The instructions may sound difficult - but they're basically pretty darn easy. The smell of chocolate and cinnamon baking in the kitchen is so yummy it'll have you making them over & over again!!!

Wishing you peace, love & a little pixie dust,
-Kendall-

Friday, February 4, 2011

Yum Yum Bubble Gum


February 4th is National Bubble Gum Day.
Seriously it is - this is not a joke!!

To honor this "Bubbalicious" of a day, the kids and I decided to conduct our own bubble gum taste test. There are so many flavors of bubble gum available out there that sometimes it can take us at least 15 minutes to decide which flavor we want to chew and blow bubbles with that day!

So the test began. We had 10 flavors of bubble gum plus the original pink bubble gum to use for our taste test. I had made charts for the kids to use that had the names of the flavors of gum we were testing and columns for them to record if they liked the flavor or not. We cut the gums into taste portions and prepared to get chewing!!!


We gave each flavor of gum the same amount of testing by chewing each piece for 2 minutes (which really is a long time if the gum you are chewing is sour and nasty!). Thirty minutes later our test was complete. Here are our findings :

Top 3 Favorite Bubble Gum Flavors

1- Original Pink Bubble Gum
You can't really mess up a classic!
2 - Paradise Punch
A tropical mouth watering sensation
3 - Strawberry Watermelon
Mixing 2 favorite flavors you can't go wrong

Top 3 Nasty Bubble Gum Flavors

1 - Sour Apple
Seriously sour and tangy and leaves you with bad breath
2 - Cherry Lemonade
Sounds yummy right? Wrong!
3 - Sour Double Berry
I think they forgot the berry flavorings and just added super sour pepper powder!

Hope this helps you next time you find yourself standing in the grocery store staring at the gum aisle for 15 min. It definately has helped solve our problem with "the flavor for the day", plus we all had alot of fun testing them!! I think the kids will be on a sugar high for at least two days now!!! 

Wishing you peace, love and a little pixie dust,
-Kendall-


Related Posts Plugin for WordPress, Blogger...